How to Remove Audio from Video on iPhone (All Methods Explained)
If you’ve ever recorded a great video only to discover loud background noise, chatter, or unwanted sounds, you’re not alone. Luckily, your iPhone offers several easy ways to remove Audio from any video, and you don’t need professional tools to do so.
In this guide, I’ll walk you through every method, from using the built-in Photos app to popular editing apps like iMovie and even online tools. By the end, you’ll know exactly which method fits your situation.
Table of Contents
- Why Remove Audio from a Video?
- Mute Audio from a Video Using the iPhone Photos App
- Remove Audio from a Part of a Video Using iMovie
- Remove Audio From an iPhone Video Using Online Tools (No App Needed)
- How to Restore the Audio Removed from the Video on iPhone
- Mute Videos Within Seconds!
Why Remove Audio from a Video?
Muting a video can make a huge difference in how clean and professional it feels. Here are the most common reasons:
- Remove Background Noise: Wind, traffic, or random talking can make a video distracting.
- Add Your Own Music or Voiceover: Many creators remove the original Audio to add background music, sound effects, or voiceover.
- Keep Privacy Intact: Maybe sensitive conversations were captured without your realizing it.
- Make Videos Look Professional: Silent clips are great for B-roll, reels, montages, and product videos to avoid copyright claims.
- Fix Unusable Audio: Sometimes the Video is great, but the Audio is not salvageable. Muting saves the content.
Therefore, removing Audio gives you more creative freedom and prevents the sharing of unwanted sounds.
Mute Audio from a Video Using the iPhone Photos App
If you want the simplest way to mute a video on your iPhone, the Photos app is the perfect choice. It offers a great range of tools for basic video editing. No downloads, no editing, just a quick mute button.
- Open the Photos app.
- Select the Video you want to mute.
- Tap the Edit button in the bottom toolbar.
- Tap the speaker icon in the top left corner.
- When the icon shows a line through it, the Audio is removed. Tap Done to save.
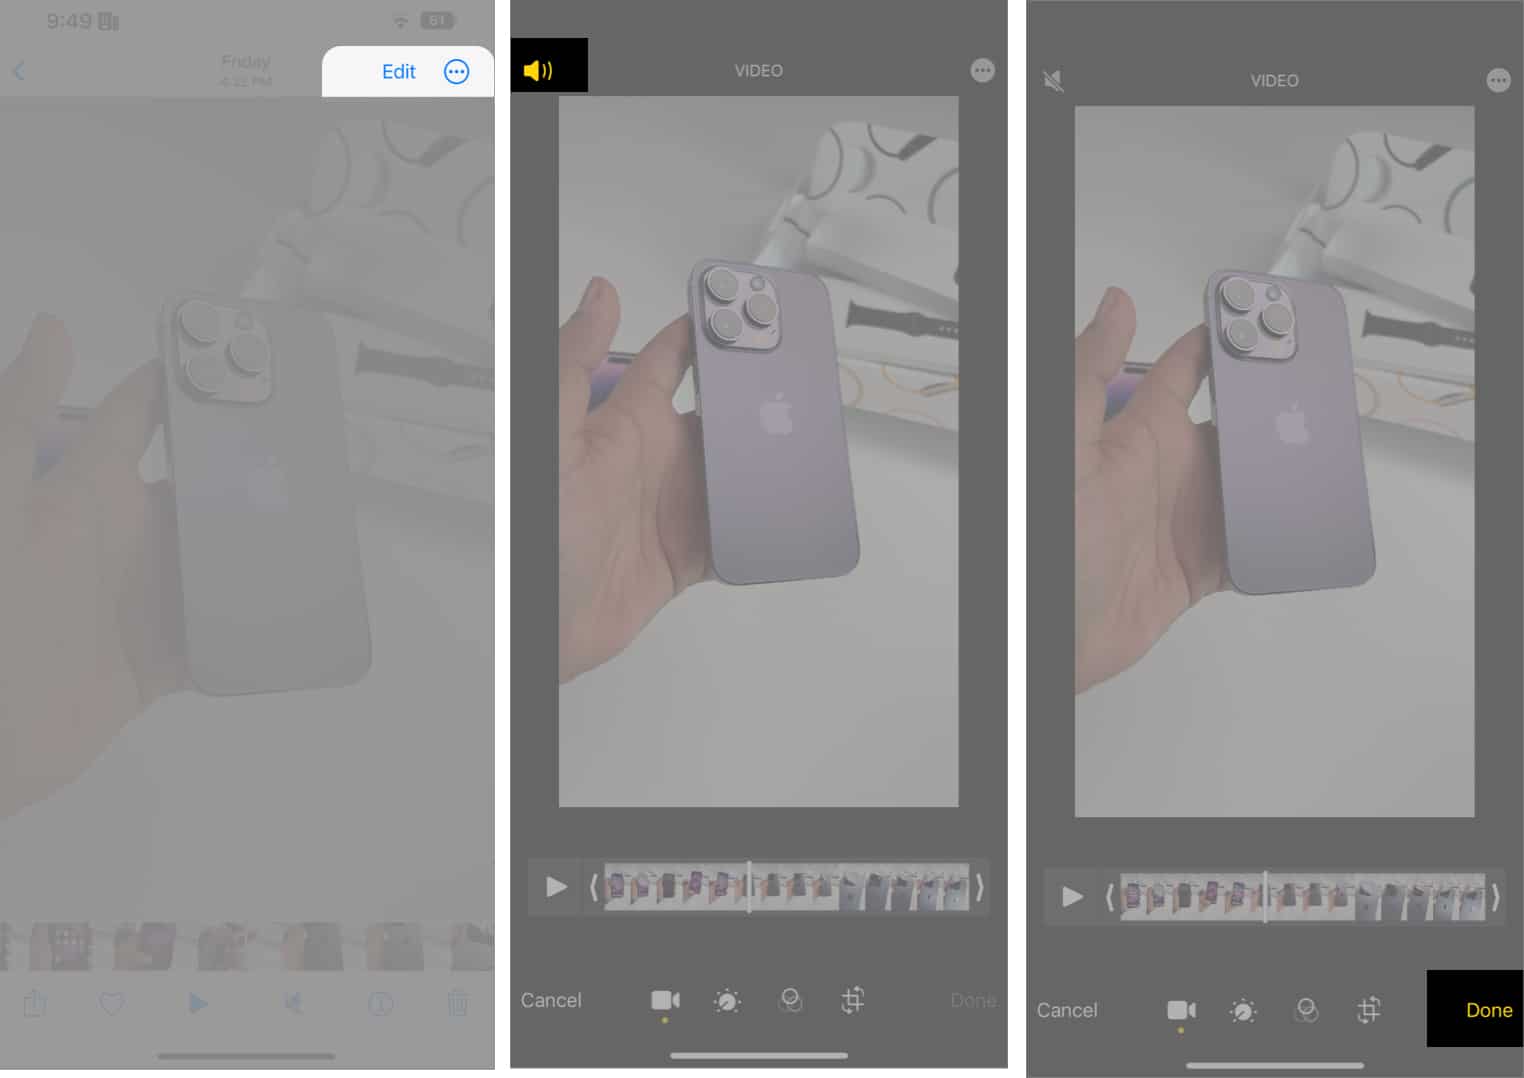
The process is extremely quick and perfect for beginners. The Video will no longer include an audio file if you plan to share it. However, if you want to remove Audio partially from the Video, you’ll need a more advanced editor.
Remove Audio from a Part of a Video Using iMovie
If you only want to mute certain parts of a clip, like one noisy moment, iMovie is the best free option. It also offers more controls, such as adjusting volume levels, replacing Audio, merging videos, and adding royalty-free music or voiceover.
- Open iMovie and select Movie under Start New Project.
- Select your Video from your library and tap Create Movie.
- The editor interface will appear. Play the Video to reach the section with noise.
- Tap the clip in the timeline. Choose Split to divide it.

- Select the section you want to mute.
- Tap the speaker icon and drag the slider to 0%.
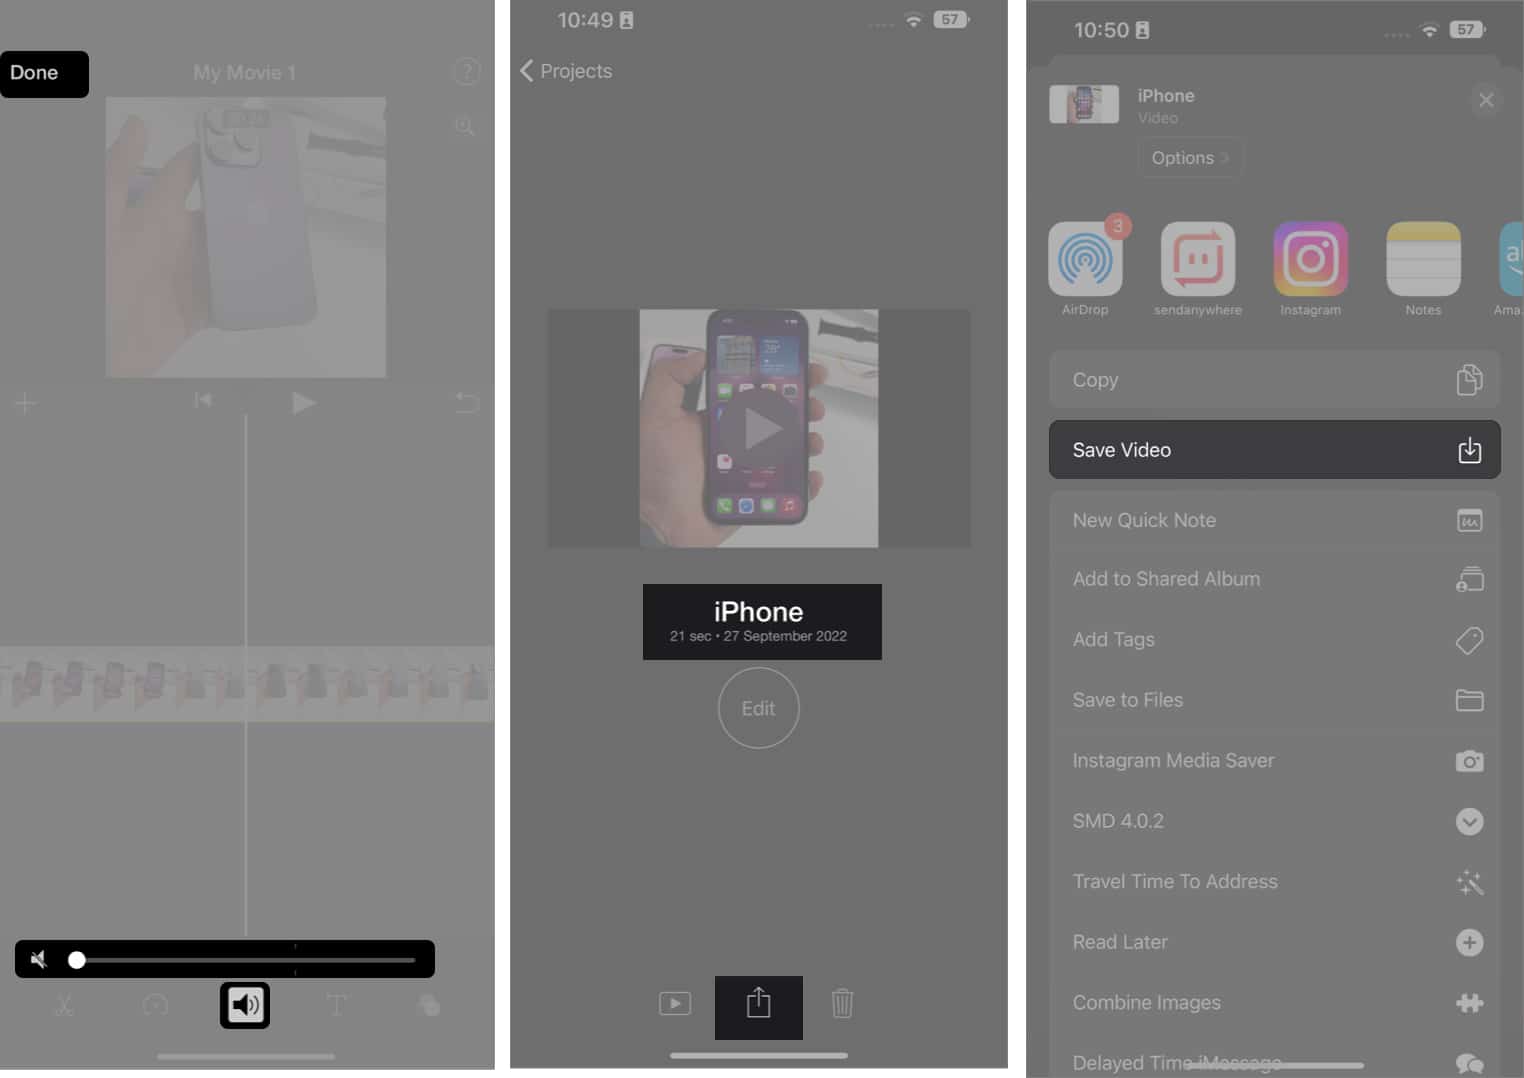
- Tap Done at the top left corner.
- To rename the Video, tap the file name above the Edit button and make the necessary changes.
- Now tap the Share button, then Save or Share Video to export it. Once the progress bar is complete, select Save Video to download the Video without the Audio.
To mute the entire Video, you don’t need to split the clip. Simply tap the speaker icon and set it to 0%. These steps are more or less the same for third-party video editor apps on iPhone.
Remove Audio From an iPhone Video Using Online Tools (No App Needed)
Don’t want to install apps on your iPhone? You can mute a video online using popular tools like VEED.io, Clideo, Kapwing, etc.
- Open Safari or any browser you like.
- Go to an online video editor. Here, I am using Clideo.
- Tap the plus sign to upload your Video.
- Look for a Speaker or Audio option and drag the volume slider to 0%.
- Download the muted Video.
Many online video editors offer noise reduction and audio extraction features, which are helpful for professional editing. However, uploading can be slow, depending on your internet connection, and it may add watermarks.
How to Restore the Audio Removed from the Video on iPhone
If you want to restore the Audio you just removed from the Video for whatever reason, you can. However, it only applies if you have used the Photos app.
- Open the Photos app on your iPhone.
- Select the Video you removed the Audio from.
- Tap Edit at the bottom of the screen.
- Then tap Revert at the top right corner.
- Select Revert to Original to confirm your selection.
The Audio is restored. You can now share the Video with Audio.
Mute Videos Within Seconds!
Removing background audio from a video on an iPhone is incredibly easy once you know the correct method. Whether you want the fastest approach with the Photos app or a full sound-editing setup with iMovie, the iPhone gives you multiple options to fit your workflow.
Which method do you like the most? Let us know in the comments below!
About The Author