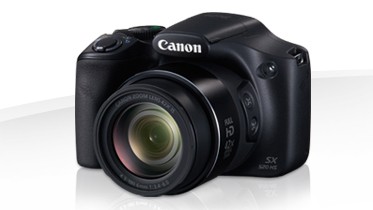
42x optical zoom available with Digic 4+ processor

The Canon SX510 HS has been around for some time, and with the increase in competition from Sony, Panasonic and Samsung, it’s not surprising to see Canon introducing new models in this sector.
In terms of its zoom range, although 42x is long, it’s not the longest on the market. That honour goes to the recently introduced Canon SX60, which features a 65x optical zoom – so if you are looking for even greater zoom, perhaps take a look at that camera. Others on the market feature up to 62x optical, too. Still, with a 24mm-equivalent wide angle lens, the SX520 gives you an impressive reach of 1008mm-equivalent at the telephoto end of the optic.
Canon has also included its ZoomPlus technology for this camera, which is its type of digital zoom. That boosts the zoom range up to 84x, and works by rebuilding the pixel count up to the same resolution as those taken using the optical zoom.
The SX510HS uses a 16 million pixel 1/2.3 inch CCD sensor, which is a fairly unusual choice in these times when most manufacturers are using CMOS sensors. Traditionally, CMOS sensors perform better, so it will be interesting to assess the image quality of the camera when we get a full sample in for review. The good thing about CCD sensors is that they tend to keep a camera’s price down.

Designed to be a slightly more advanced product than other bridge cameras in Canon’s line-up, along with fully automatic modes, you can also shoot in manual and semi-automatic modes (such as aperture priority and shutter priority) with the SX510HS. The ability to shoot in raw format is not offered, though.
The camera uses a Digic 4+ processor, and while this isn’t Canon’s most recent processor, it is claimed that it is 60% quicker at high ISOs and 30% quicker at focusing and processing than a standard Digic 4 processor, which is what the SX510 used.
Other interesting features include Hybrid Auto, which takes a two-second clip of video along with every picture (when shooting in auto mode) for a highlights video at the end of the day, and Creative Shot, which takes five images with a digital filter applied.
The camera’s sensitivity runs from ISO 100-3200, and Zoom Framing Assist is also included – this helps when framing an image with the lens zoomed out to full telephoto zoom.
Build quality and handling
A quick glance at the SX520 may lead you to believe that the camera is a small DSLR, being reasonably similar in size to something like the Canon EOS 100D. It is likely to be the large zoom lens which causes this fairly large size.
It’s much lighter than a DSLR, but still has enough weight to give it an air of quality.
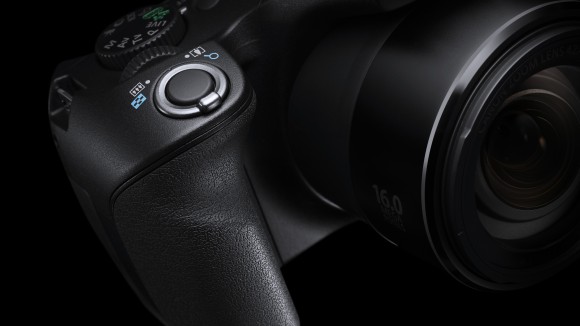
There’s a chunky grip which feels very comfortable in the hand, with a ridge on the grip for your finger to make it sit very nicely. On the top of the grip is a zoom switch for extending the lens – this makes it more similar in usability to a standard compact camera than a DSLR which would usually require you to zoom via the lens itself.

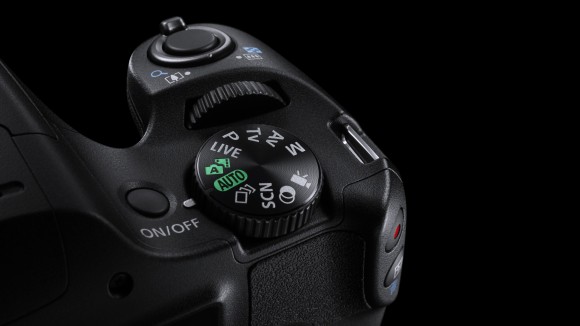
Also found on this grip is a scrolling dial, similar to that you might find on a DSLR, which can be used for changing various settings depending on the shooting mode you’re in. For instance, while in aperture priority, you’d use it to control aperture. Anyone who has been familiar with Canon’s range of EOS DSLRs will feel very at home here.
You’ll also find a mode dial, which allows you to quickly change between different exposure modes, such as manual, automatic or aperture priority. Look out also for the Hybrid Auto mode which will shoot a two-second clip of video before you press the shutter release to take a still image.
The button layout on the back of the camera is also very reminiscent of Canon’s DSLR range. You’ll find a four way navigational pad, with each of the buttons assigned to a different function. For instance, up accesses sensitivity (ISO), left accesses focusing mode, down accesses display options, and right accesses flash options.

Just to the right of the thumb rest are two dedicated buttons for video recording and exposure compensation. Once you’ve pressed exposure compensation, you can then use the scrolling dial on top of the camera to adjust exposure. You’ll need to press the exposure compensation button again to return to being able to change aperture or shutter speed with the dial.
To make quick changes to common settings, press a function button in the centre of the four-way navigational pad and you’ll be presented with a host of different settings including aspect ratio, white balance and metering (depending on the shooting mode you’re working in).
A dedicated button is also available for changing the drive mode. The other two buttons on the back are a playback button and a menu button. On the side of the lens is the frame assist button. Hold this button down while zooming into a subject and the lens will retract, allowing you to find the subject again. Once you’ve found it, release the button and the lens will return to its former zoom point.


