Notes on iPhone is an Incredibly Powerful App (If You Know About These Features)
 Credit: JL IMAGES / Shutterstock
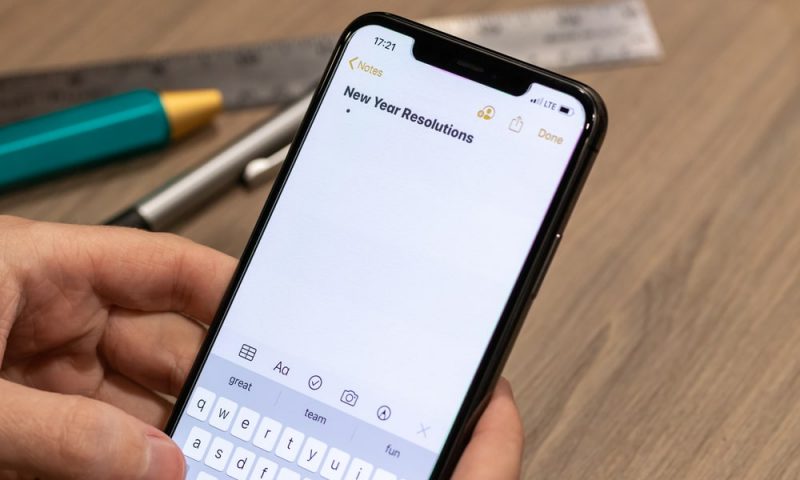
What if we told you that you’re not using the Notes app to its full potential? Apple has developed Notes so much, it now works as a fully fledged note-taking app you can use for grocery lists, work, school, or to journal. It also allows you to draw and have fun.
At first glance, the Notes app doesn’t seem like it’s that powerful, but once you start making the most out of it, you’ll never want to try a different note-taking app again.
To get you started, we’ve gathered some of the best Notes app tips and tricks you probably don’t know about.
Three Weird (But Legit) iPhone Games That Let You Earn Legit Cash
Do you have an iPhone? Very likely since you’re reading this. But did you know that you can use your iPhone to make extra cash whenever you’re just waiting in line … get these gaming apps and start earning money ASAP!
1. Learn How to Search the Right Way
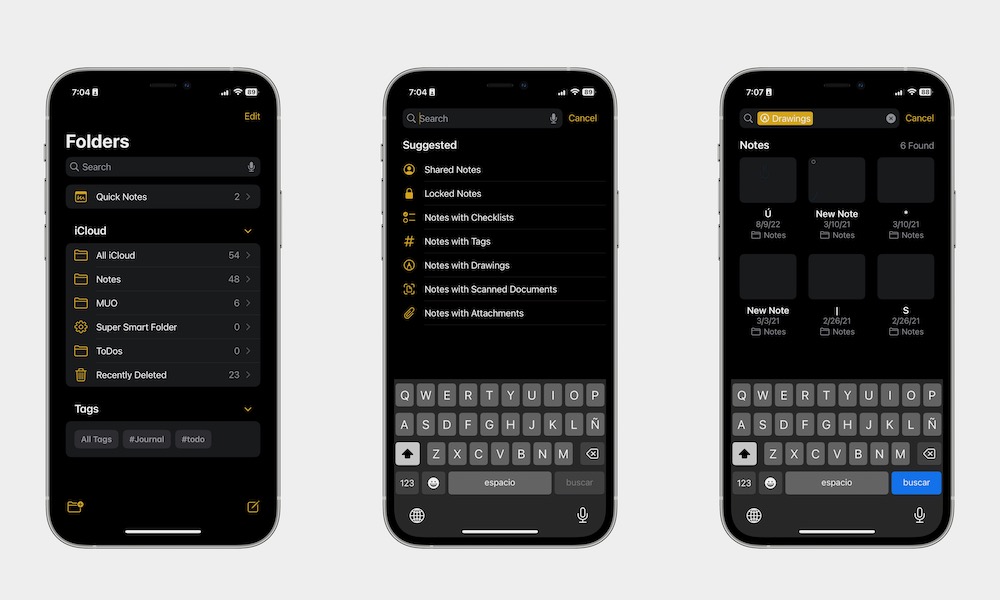
You don’t have to give the names of your notes or remember what you wrote in them to search for them. The Notes app’s search function can help you find notes based on what they have.
You don’t have to give the names of your notes or remember what you wrote in them to search for them. The Notes app’s search function can help you find notes based on what they have.
- Open the Notes app.
- Tap the search bar at the top.
- Under the Suggested list, choose what you want to search for.
The Notes app will give you a list of results based on what you choose. That way, you can search for notes with checklists or even notes with drawings.
2. Start Using Quick Notes
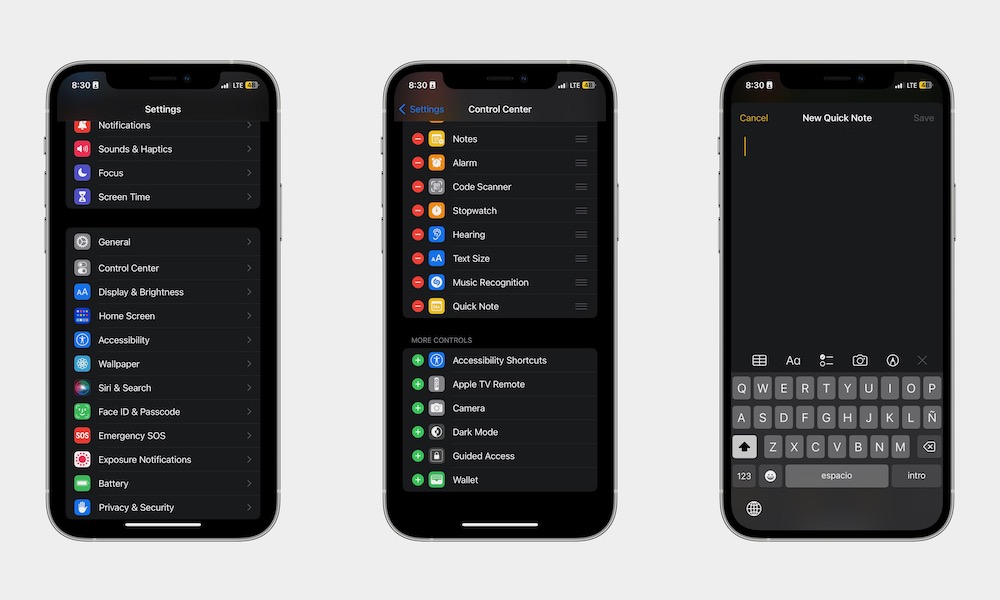
Taking notes is already pretty easy, but Apple took it one step further and introduced Quick Notes to the iPhone. Now, you can open a note from your Control Center and start writing to your heart’s content. But first, you need to add Quick notes to your Control Center like this:
- Open the Settings app.
- Scroll down and tap on Control Center.
- Scroll down again and tap the plus button on the left side of Quick Note.
- If you want, you can move Quick Note up or down by dragging the right side of it.
Now, all you need to do is open Control Center by swiping down from the top right corner (if you have an iPhone without a Home button) or swiping up from the bottom of your screen (if your iPhone has a Home button), and tap the Quick Note control. A new note will appear on your screen, so you can start writing anything you want.
Afterward, all you need to do is tap Save in the top right corner of your screen, and your note will be saved in the Notes app. But a quicker way is to go back to your Home Screen or lock your device. Your iPhone will still save the note automatically.
3. Keep Your Notes Organized With Tags
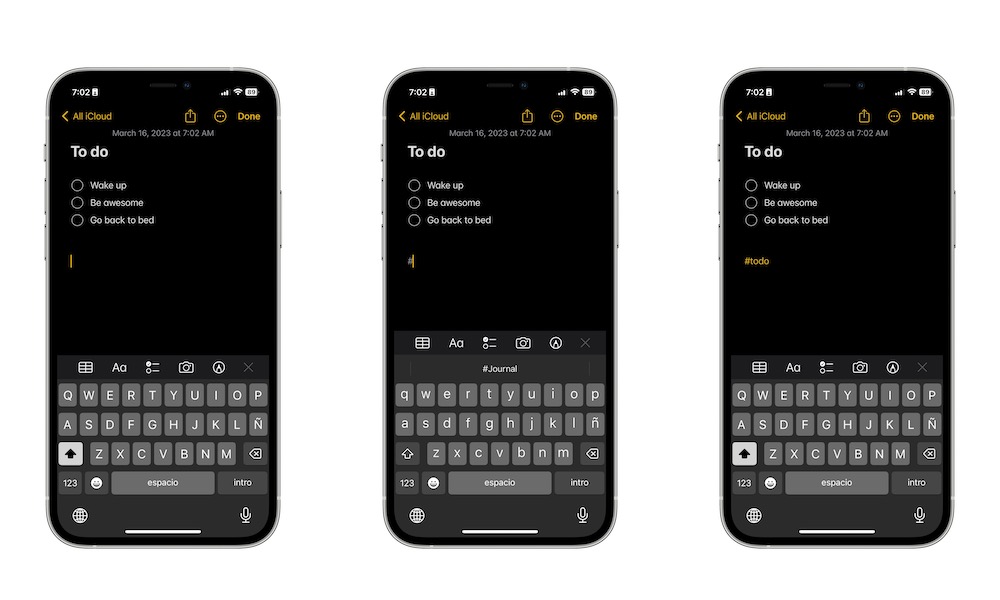
Tags are a helpful and fairly new feature that helps you keep all your notes organized. The best part is that creating a tag is super easy, and you can reuse them however you want.
To create a tag, you need to:
- Open or create a note.
- At the bottom of your note (or wherever you want), write “#” followed by the tag’s name you want to use. For example, you could write something like “#todo.”
Congratulations! You just created your first tag. You’ll know it worked because the tag will turn yellow. Next time you add a “#,” Notes will give you a list of possible tags you may want to use.
4. How to Find Your Tagged Notes
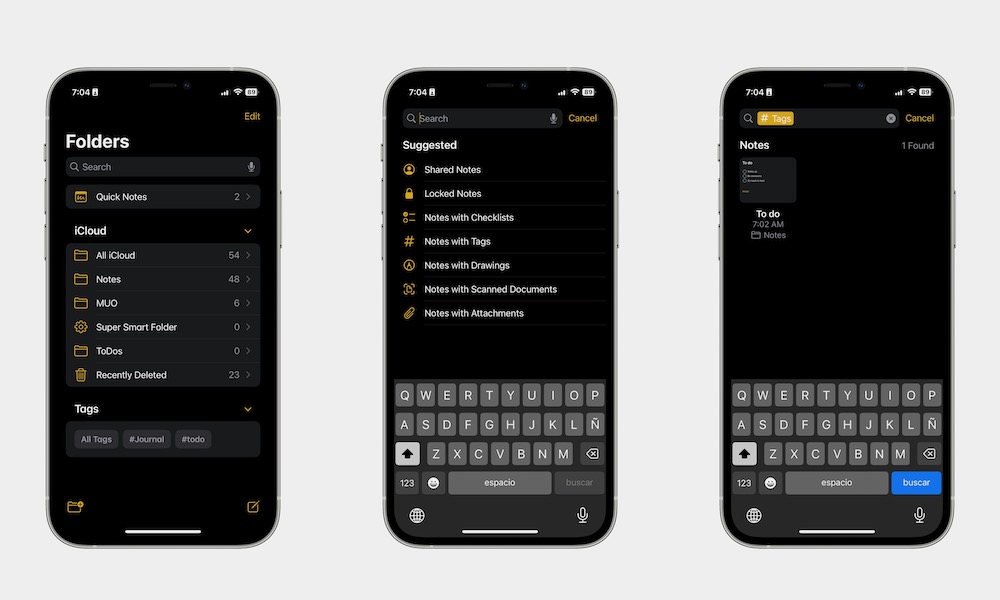
Adding tags to your notes is just the tip of the iceberg; you also need to learn how to find your notes.
First, you can find them with the search bar, just as we previously showed you. After you tap the search bar under Suggested, you’ll need to select Notes with Tags. By default, Notes will show you every note that has a tag in it, but you can tap the search bar and search for specific tags by writing “#” and then the tag’s name.
The other way to look at all your tags is to just open the Notes app. Afterward, scroll to the bottom, and you’ll find the Tags section. You’ll see a list with all your available tags, and you can tap on any to find the notes you want.
5. Ask Siri to Take Notes for You
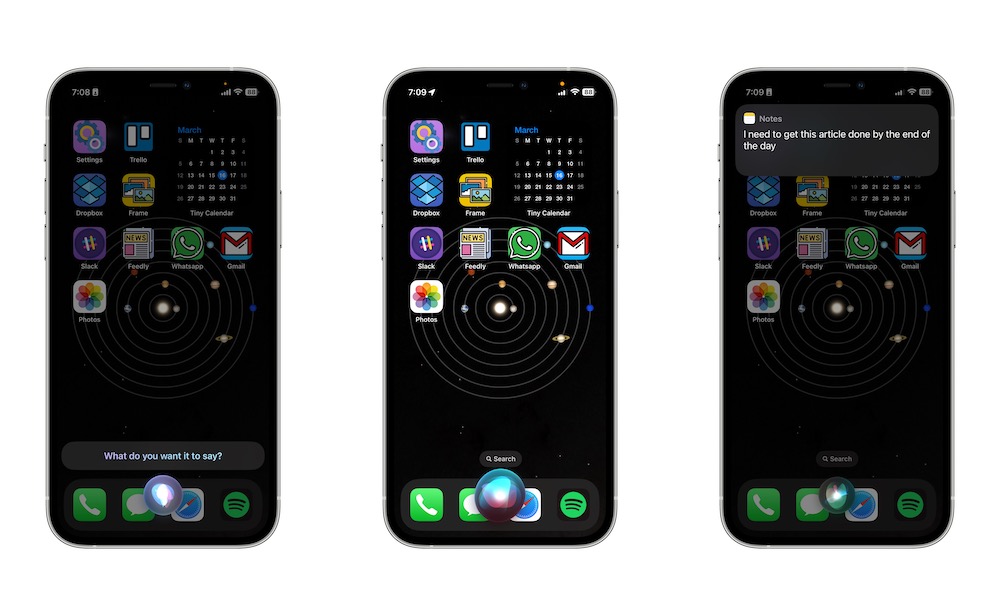
If you have your hands full but you don’t want to forget something you’re thinking about, Siri can write notes for you if you need to.
All you need to do is say something like “Hey, Siri, add a new note” or something similar. Siri will then ask you what you want the note to say and then will automatically save your new note. It’s just that easy.
6. Use Notes to Scan Any Document
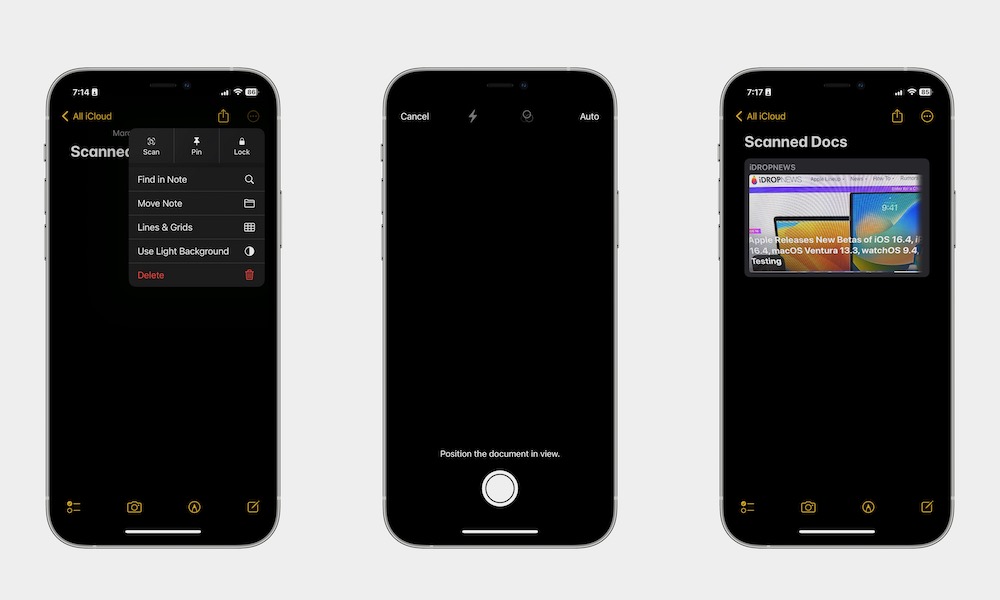
If you use your Notes app for work or school, you’re going to want to use it to scan the documents you need. The best part is that, because of Live Text, you can also copy and paste the document wherever you want.
First, to scant a document, you need to:
- Open Notes.
- Open or create a new note.
- Tap the three-dot button in the top right corner of your screen.
- Select Scan.
- Scan the document you want.
- You can keep scanning more documents, and when you finish, tap on Save in the bottom right corner of your screen.
Afterward, if you have Live Text enabled, you can copy the text of any scanned document by long-pressing the text and then selecting Copy.
7. Start Using Smart Folders
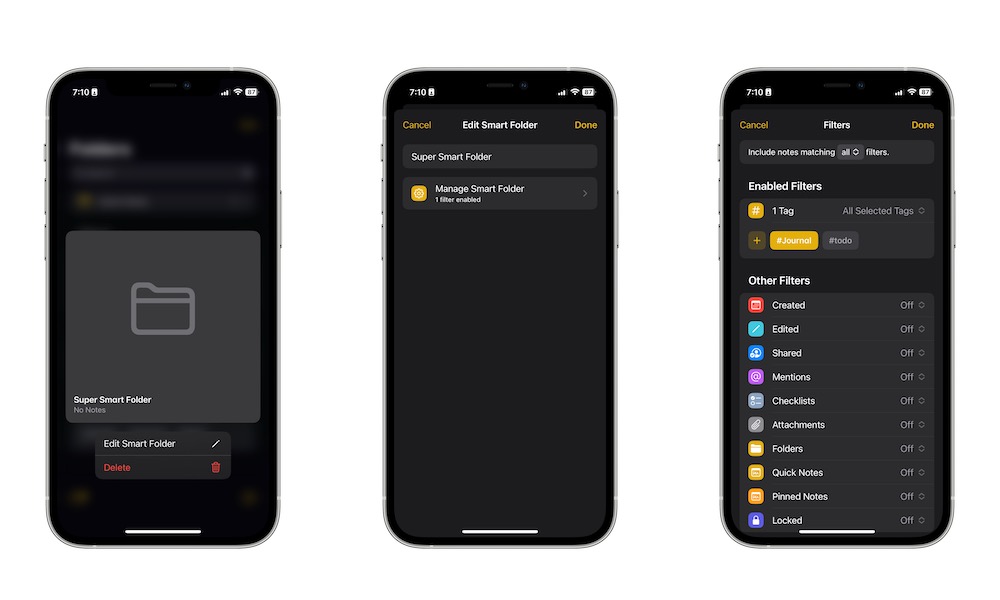
If you have a lot of notes, then Smart Folders will become your best friend. This feature lets you create a folder that will automatically store certain notes based on the filters you use.
For instance, you can create a Smart Folder to keep all the notes that have drawings and another folder to keep all the notes that have a #homework tag. This is how to use them:
- Open Notes.
- Tap the Folder icon in the bottom left corner of your screen.
- Select Make Into Smart Folder.
- Select the filters you want. You can use more than one, but keep in mind that Notes will not choose one filter or the other; it will search for notes that have both filters.
- Tap Done in the top right corner of your screen.,
- Give your new Smart Folder any name you want, and then tap Done again in the top right corner.
Make the Most Out of the Notes App
The Notes app is one of Apple’s most powerful tools. Keep your work or personal notes in it, and rest assured that you’ll be able to find them on any other Apple device you have.
Try exploring Notes by using these tips and playing around. In the end, you’ll learn what you like personally and it will stick with you. We’ve also recently covered tips and tricks for the Calendar and Reminders apps so be sure to check them out.


