How to Set Up Voicemail on iPhone
When you get your first iPhone, setting up voicemail is essential. You want to make sure that if you miss a call, your caller can leave a message. Here’s how you can set up voicemail and check your messages on iPhone.
Once you get your voicemail ready, you can adjust your notifications, so you know when a message is waiting. We’ll show you this as well as how to listen to a message, change the password if needed, and even re-record the greeting.
Set Up Voicemail on iPhone
Setting up voicemail on iPhone is a simple process that takes place in the Phone app. Open Phone and tap the Voicemail tab at the bottom.
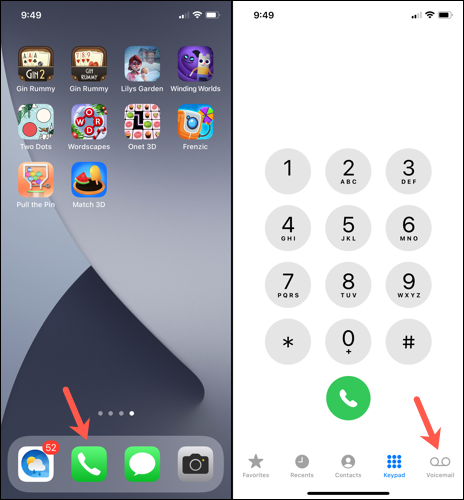
Select “Set Up Now,” create a voicemail password, and choose if you want a Default or Custom greeting. If you pick Custom, you can record your own greeting by simply following the prompts.
And that’s all there is to it!
Listen to Your Voicemail Messages
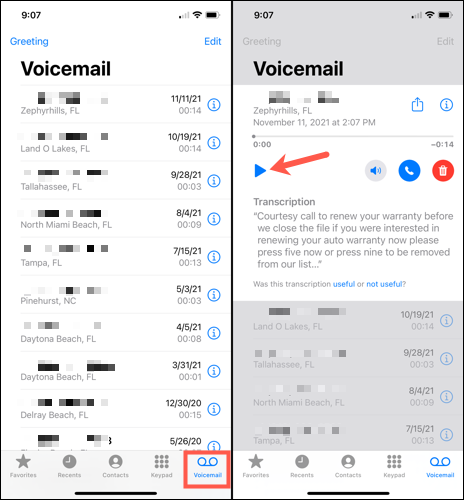
To access your voicemail and listen to your messages, head to the Voicemail tab in the Phone app. You’ll see a list of messages you’ve received as long as your carrier supports Visual Voicemail.
Select a message and tap the Play button to listen to it. If your wireless carrier also supports the Voicemail Transcription feature, you’ll also see your message transcribed to text. This is handy for a quick view of the message.
Note: Visit the Apple Support page to see which voicemail features are supported in your region and for your carrier.
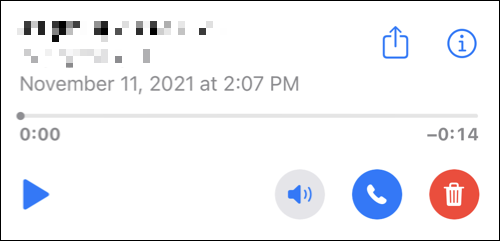
You’ll see a few other buttons for the voicemail message on the right side. Tap the speaker icon to hear the message in speaker mode, the phone icon to call the number back, or the trash can icon to delete the message.
You’ll also notice a share button on the top right you can use to send or share the message using your iPhone Share Sheet options. And finally, you have an info icon (small letter “i”) for details about the call or caller.
Adjust the Voicemail Notifications
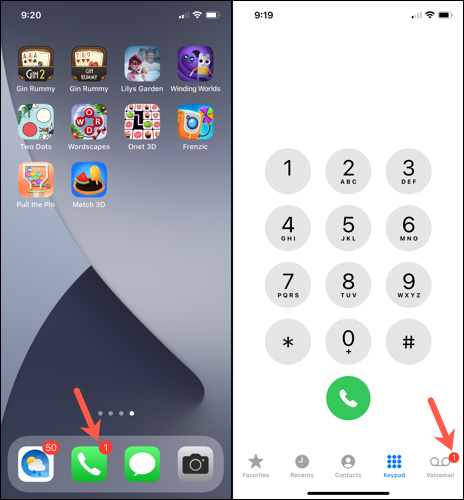
When you have a new voicemail, you’ll see a badge app icon on the Phone app by default. You can change this by going to Settings > Phone > Notifications. This number displays all notifications from the Phone app including missed calls and voicemails.
RELATED: How to Make Notifications Actually Display on iPhone
When you open the Phone app, you’ll see a number on the Voicemail tab for the number of unplayed messages you have.
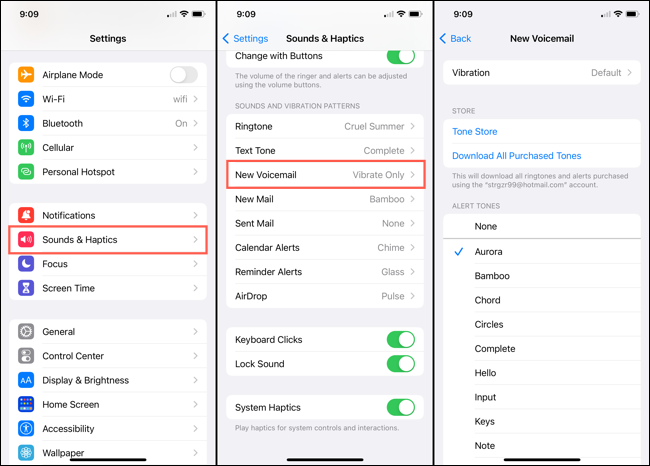
You can also set up an alert when you receive a new voicemail. Open Settings and select “Sounds & Haptics.” Pick “New Voicemail” under Sounds and Vibration Patterns.
Tap “Vibration” at the top to choose a pattern and select one of the Alert Tones or Ringtones at the bottom for the sound. Tap “Back” on the top left to save and exit.
Change the Voicemail Password
If you want to change the password you set up initially for voicemail, you can do this in the Settings app as well. Select “Phone,” pick “Change Voicemail Password,” enter the new password, and tap “Done.”
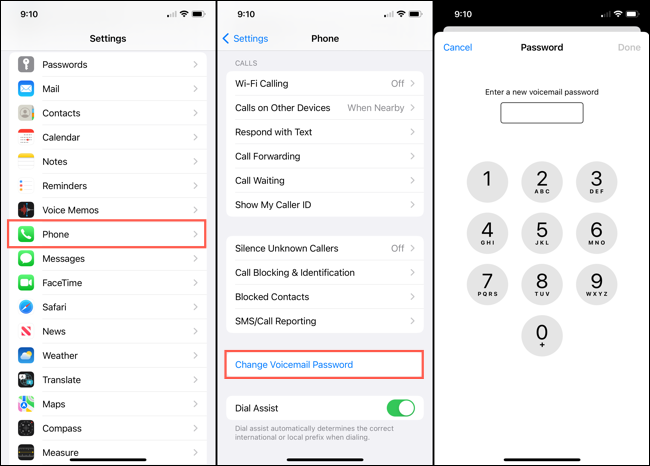
Note: If you forgot your current voicemail password, contact your wireless carrier.
Record a New Voicemail Greeting
You may also want to change the greeting you recorded for your voicemail. Open the Phone app, select the Voicemail tab, and tap “Greeting” on the top left.
Tap the Play button to hear your current greeting. To record your own, select “Custom,” press “Record” to start, “Stop” to finish, and then “Save” to use the greeting.
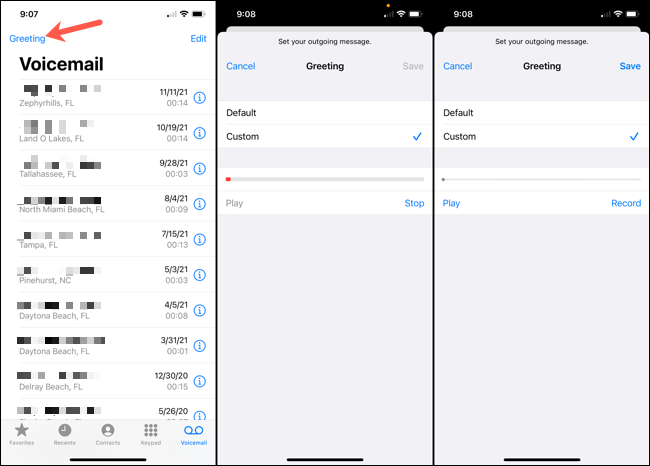
As you can see, setting up voicemail on iPhone is easy and worth a few minutes of your time so callers can leave you a message when you’re unavailable to answer.
For additional help with calls on your iPhone, learn more about the Silence Unknown Callers feature for reducing spam calls or how to enable full-screen incoming calls.
RELATED: How to Silence Unknown Callers to Stop Robocall Spam on iPhone


